From breakfast to dinner, from healthy meals to sweet desserts – Next Yum Recipes brings you quick, simple and tasty ideas for every occasion and every time.


 This Recipe
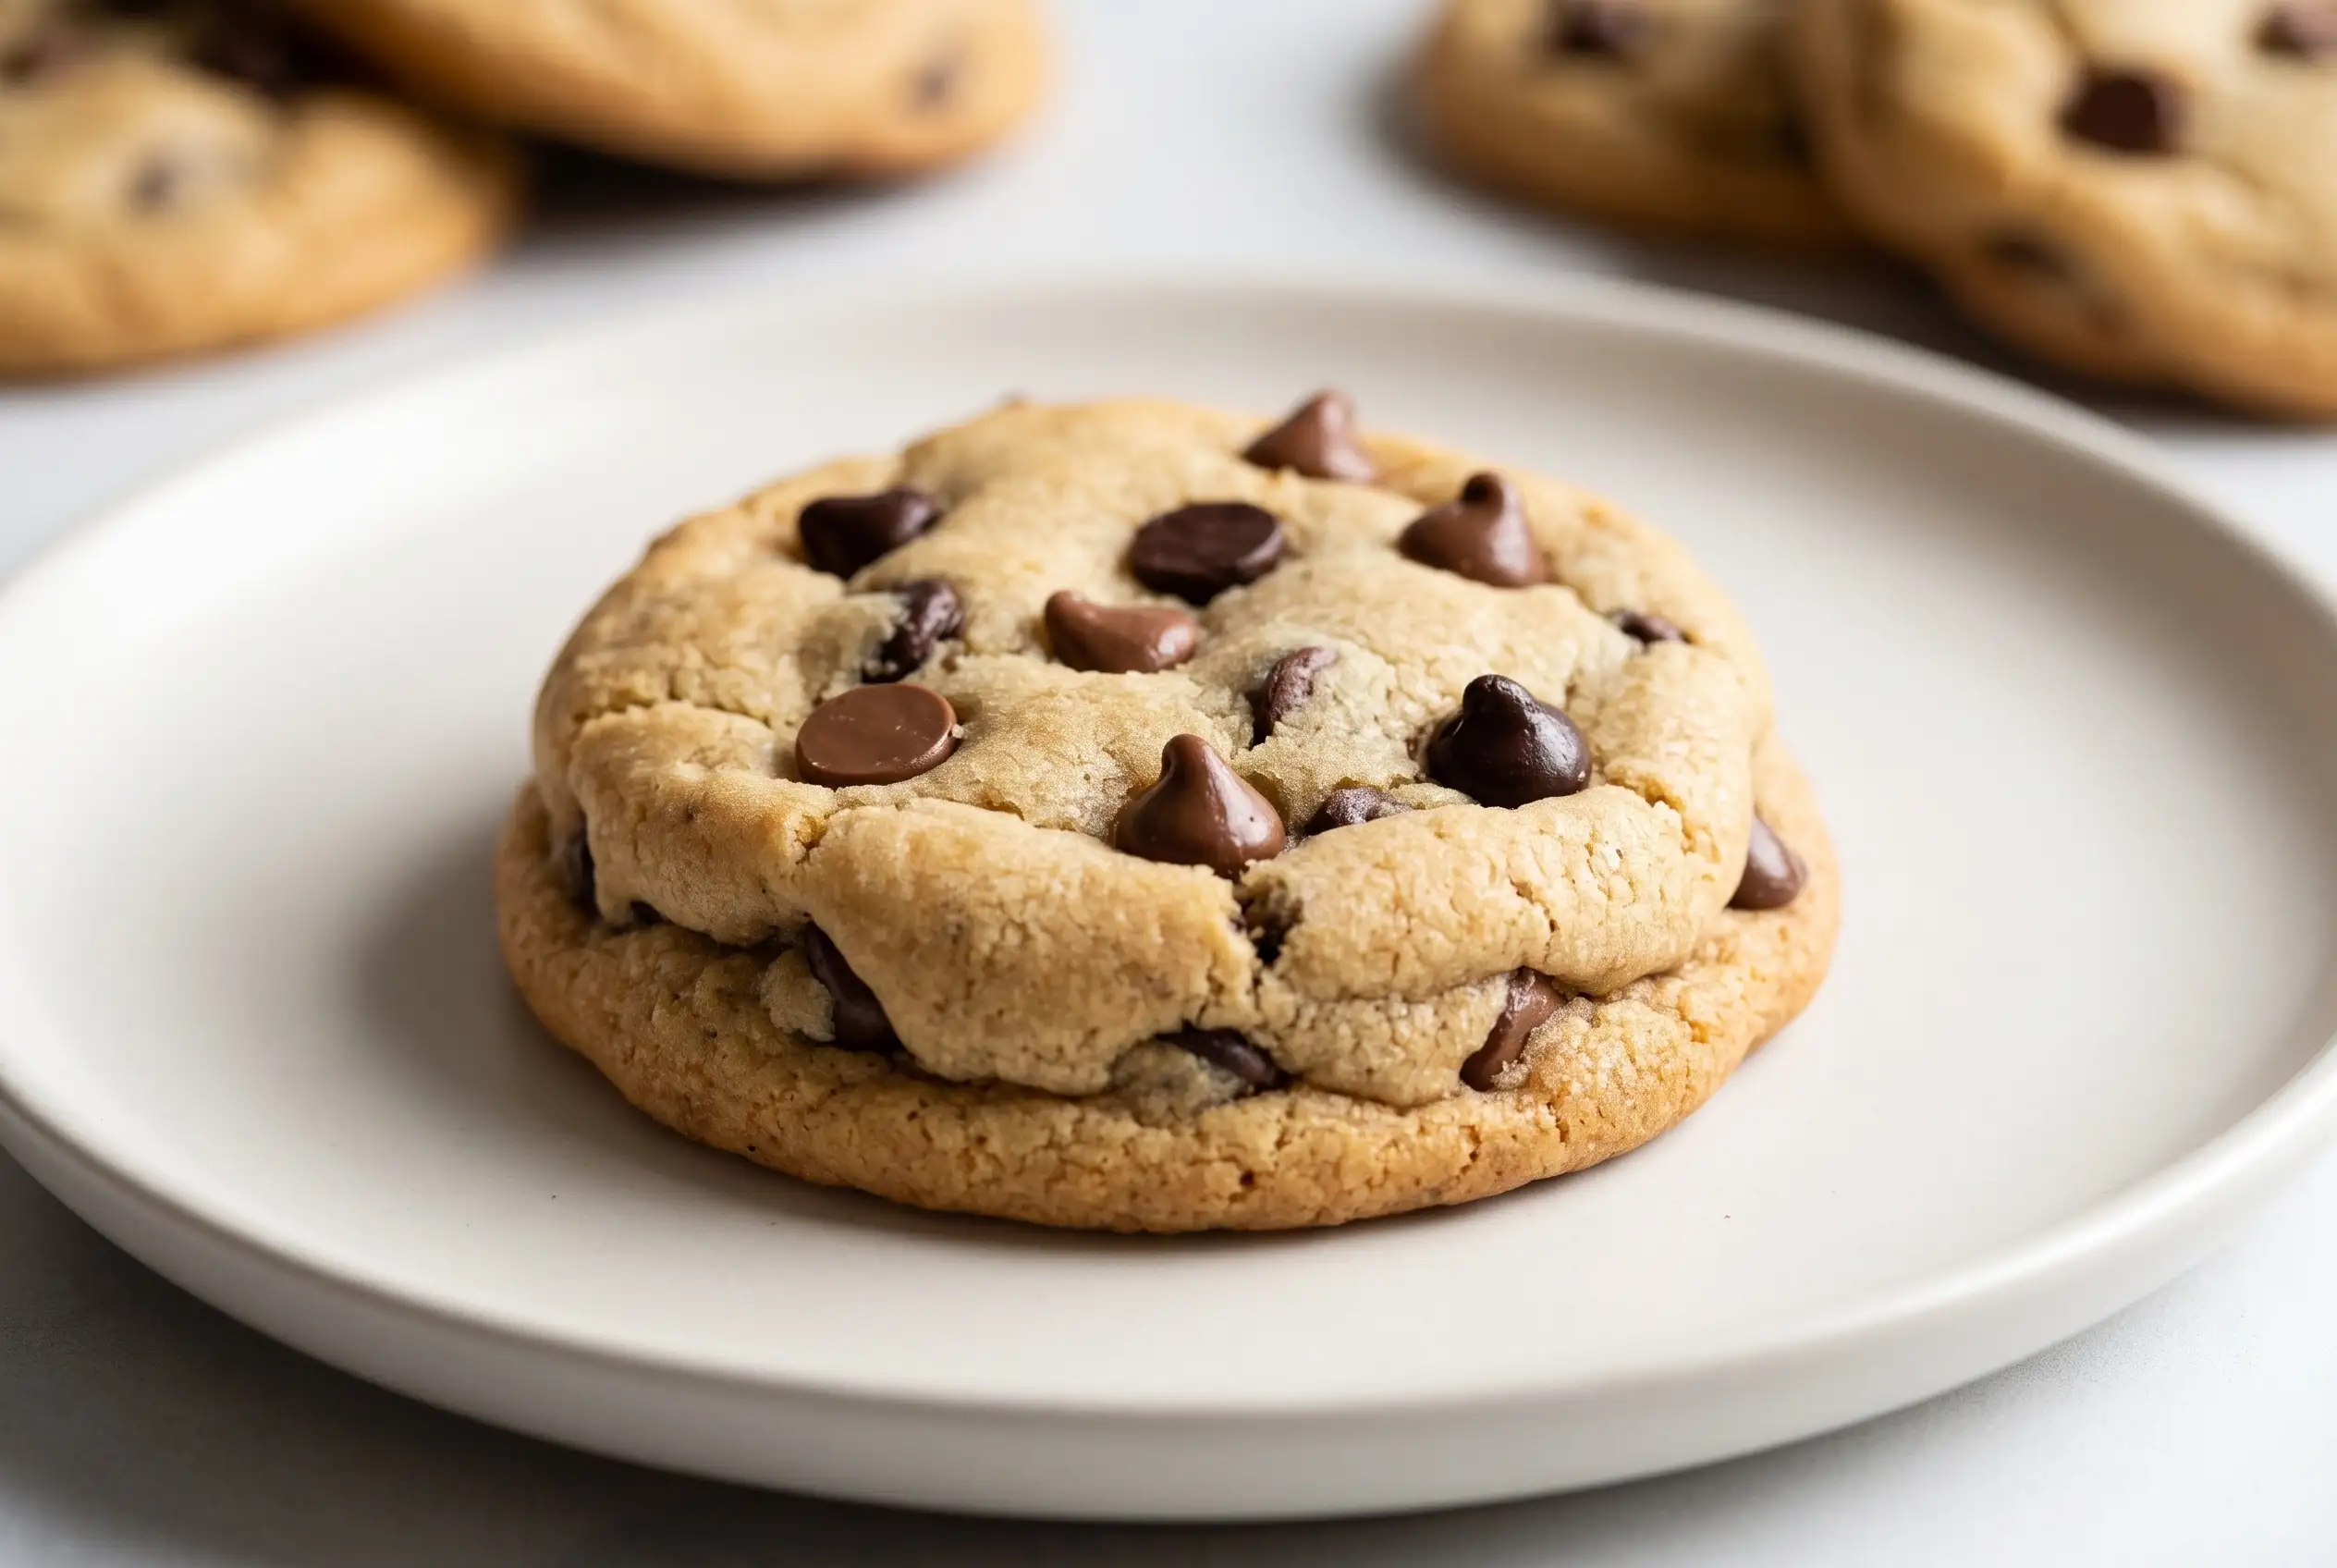
Half-batch chocolate chip cookies are built for the moment when you want thick, soft-centered chocolate chip cookies without making a full-size batch. The key is not simply reducing every ingredient by half; the texture depends on how the butter is softened, how much flour the dough actually needs, and when the cookies leave the oven. A lightly melted butter base, a modest amount of brown sugar, and tall dough balls create baked chocolate chip cookies that stay thick while the centers remain tender, with brown sugar cookies offering another way to see how this ingredient contributes to a tender cookie texture.
Why These Chocolate Chip Cookies Stay Thick
Height begins with the butter. Part of the butter is melted during the oven warm-up, but it must not become completely liquid. After cooling, it should be a soft solid that can still be creamed with the sugar. That condition gives the dough enough structure to form tall portions without making the cookies dense.
Flour provides the other important boundary. The starting amount can produce a dough that still looks wet, so extra flour is added gradually only when needed. Once the dough begins holding together as one dry-looking ball, additional flour becomes counterproductive. Too much can make the finished cookies stiff.
Portion shape matters at the oven door, too. Rolling the dough into high, round balls gives the cookies more thickness from the beginning. Because they bake for only a short time, that shape helps preserve a soft middle while the edges and tops develop a little color.
Butter Temperature Controls the Dough
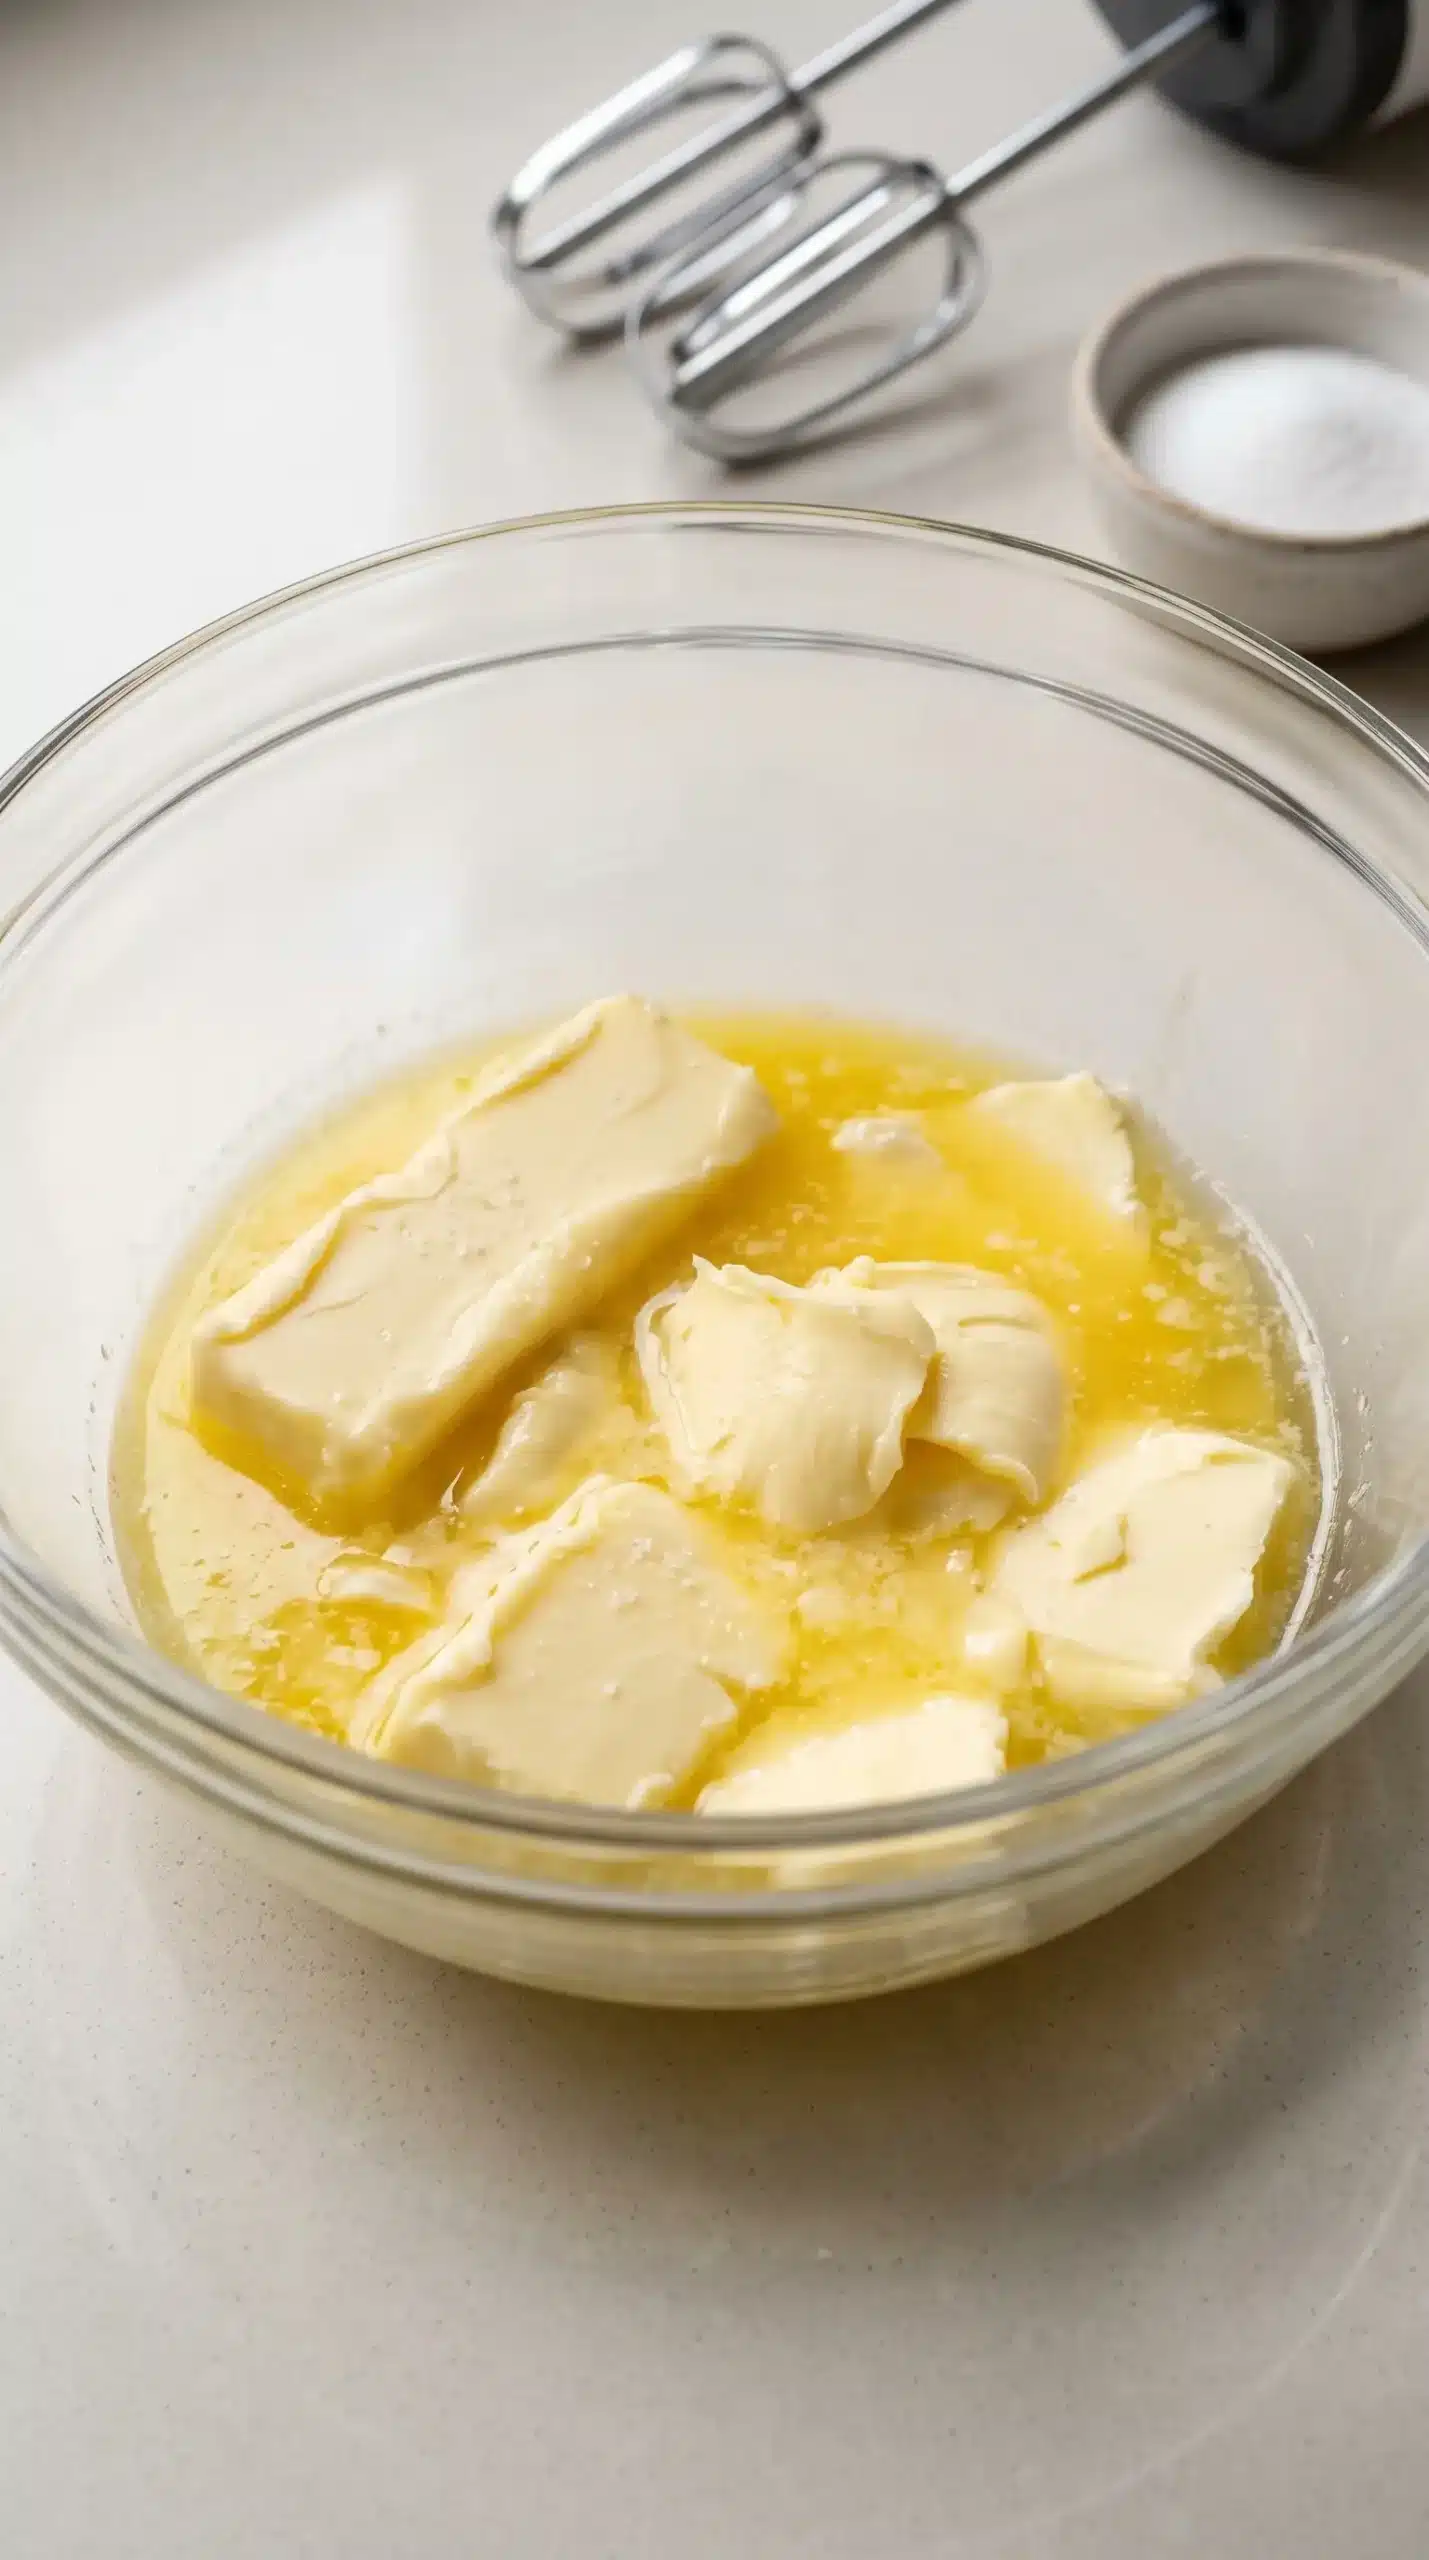
Using partially melted butter calls for more attention than simply softening a stick on the counter. The butter should be removed from the warm oven after roughly one third to one half has melted, then allowed to return toward room temperature. It does not need to become completely firm again, but it should no longer be liquid.
Once the butter has cooled, creaming it with the white sugar and vanilla should produce a mixture that is well blended and lightly fluffy. Adding the egg afterward works best when the butter is not hot, because the mixture needs to remain suitable for incorporating the dry ingredients evenly.
For half-batch chocolate chip cookies, this temperature checkpoint is especially useful because there is less dough to buffer changes in consistency. If the butter remains very liquid, the dough can become harder to judge when flour is added. Waiting for a soft-solid texture gives the mixing stage a more predictable starting point.
The Flour Decision Makes or Breaks the Texture
The flour amount is intentionally flexible at the mixing bowl. Begin with the stated amount, then watch the dough instead of automatically adding more. A dough that sticks heavily to the sides and appears wet needs another tablespoon of flour, while dough that has already formed a cohesive, dry-looking ball is ready for the chocolate chips.
That small visual decision has a large effect on thick chocolate chip cookies. Flour absorbs moisture and gives the dough enough body to hold its shape, but every additional spoonful also makes the baked texture firmer. The useful stopping point is the moment the dough changes from visibly wet to cohesive and workable.
- Wet and sticky: add one tablespoon of flour, mix briefly, and reassess.
- Cohesive and dry-looking: stop adding flour so the cookies do not become stiff.
- Firm after flour is added: avoid continuing to add flour simply because a little remains available.
Chocolate Chips Shape Each Bite
A mixed selection of chocolate chips works naturally here because the dough is portioned into substantial rounds. Instead of treating the chips as decoration alone, reserve a few visible pieces for the tops of the dough balls. That places chocolate directly on the surface as the cookies bake and makes the finished rounds look generously filled.
Mixing Should Stop Before the Dough Gets Tough
Once the dry ingredients enter the bowl, use the electric mixer on low speed and stop as soon as the flour has been incorporated. Scraping the sides helps eliminate dry pockets without requiring prolonged mixing.
The chocolate chips should be folded in with a wooden spoon after the dough reaches the right consistency. This short final mixing stage distributes the chips without continuing to work the dough with the electric mixer.
Overworking is particularly easy to do when adding flour gradually because each addition can tempt you to keep mixing until the dough looks perfectly uniform. There is no need for that. Once the flour disappears and the dough gathers into one cohesive mass, the useful work is finished.
High Dough Balls Protect the Soft Center
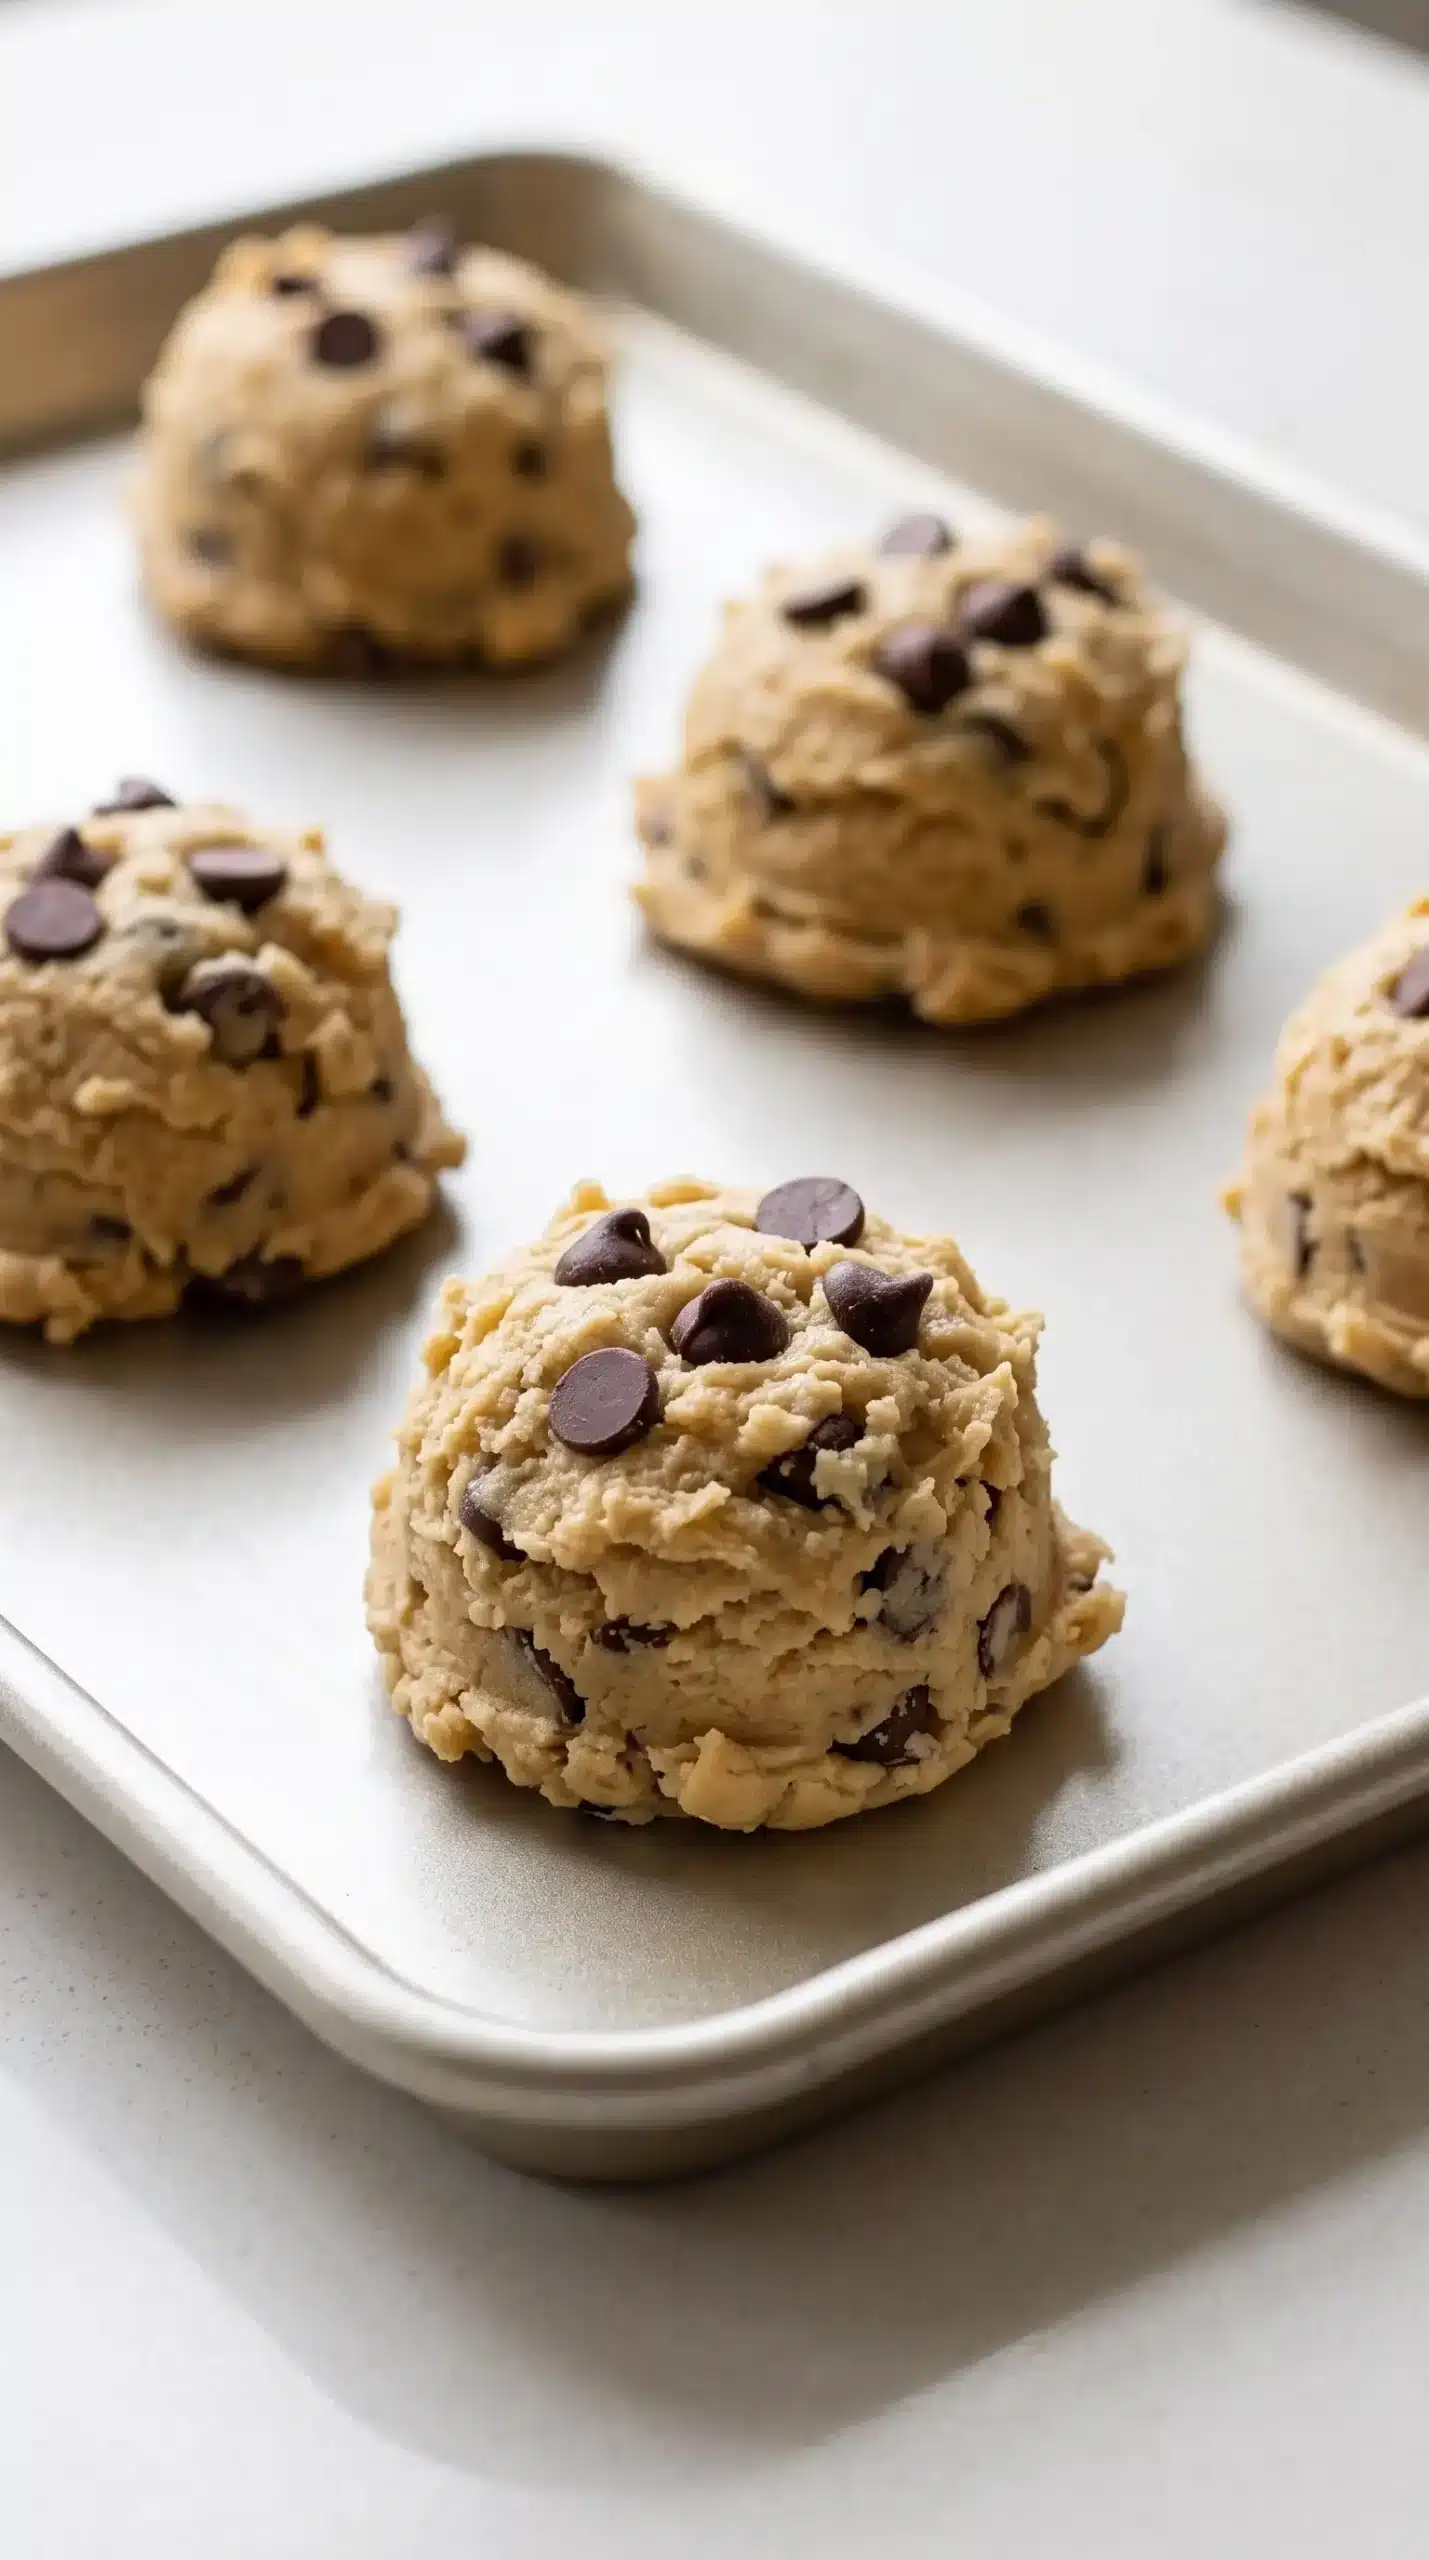
These cookies benefit from being shaped taller and rounder than a flattened scoop of dough. The elevated form gives the portions enough thickness to remain substantial while the surface begins to brown.
Place the portions several inches apart on the baking sheet so the cookies have room to spread without running into one another. Keeping chocolate chips visible on the upper surface also helps identify where the portions are positioned and gives the baked tops their characteristic chocolate-studded appearance.
A Short Bake Keeps the Cookies Tender
The oven needs to be at 350 degrees when the shaped dough goes in. Watch the appearance closely as the bake approaches its short endpoint: the cookies should look puffy, with only a tiny amount of browning on the tops and edges.
Removing the cookies at that stage is important because they continue to settle after leaving the oven. A little loss of puffiness is expected as they stand, but the cookies should remain thick enough to hold together.
The hot baking sheet can keep the cookies cooking briefly after they leave the oven, so residual heat from the baking sheet is another reason to remove them before they develop deep browning.
Color is more useful than chasing a rigid visual expectation of complete doneness. Deep browning would move the texture away from the soft, thick result these portions are designed to produce. The surface should look set enough to handle while the centers still appear tender.
What the Finished Texture Should Tell You
Appearance provides several useful clues before the first bite. Properly baked chocolate chip cookies should have lightly colored edges and tops, a noticeable puff, and enough structure to stay intact after cooling briefly. The centers should not look completely dry when they leave the oven.
| Visual cue | What it indicates | Useful response |
|---|---|---|
| Puffy tops | The portions have retained their height during baking | Check the edges and top color rather than waiting for a flat appearance |
| Tiny edge browning | The cookies are approaching the desired baked stage | Prepare to remove them from the oven |
| Thick, intact rounds after resting | The dough had enough structure and was not overbaked | Let them finish settling before moving them extensively |
Common Half-Batch Cookie Mistakes to Avoid
Partially melted butter can become a problem if more than half of it melts before cooling. Fully liquid butter changes the starting texture of the dough and makes the intended soft-solid stage harder to achieve. Keep the warming step restrained, then give the butter time to cool.
Adding flour by habit is another common error. The dough is supposed to guide the adjustment. If it already gathers into a cohesive ball, more flour is unnecessary and can push the cookies toward a stiff texture.
Waiting for strong browning can also lead to overbaked cookies. The supplied method calls for removing them while they are still puffy and only slightly brown on the tops and edges. They will lose some puffiness while standing, so that change should not be mistaken for underbaking.
Small Changes That Fit the Dough
Mixed chocolate chips can be adjusted according to what is already in the pantry, provided the overall amount stays close to the stated quantity. Using different varieties within that amount preserves the intended chocolate-rich character without changing the dough balance.
Vanilla can remain as written, while the salted butter and added salt should not be treated as interchangeable quantities. The salt is part of the dough formula, so reducing or increasing one ingredient should not be used as a casual substitute for the other.
For a slightly different chocolate distribution, place a few of the mixed chips on top of each shaped dough ball before baking. That does not alter the dough itself, but it changes where the chocolate appears on the finished surface.
Choose the Right Moment to Stop Adding Flour
The most useful flour test happens inside the mixing bowl, not on a measuring cup. After the initial flour has been incorporated, look for two signs together: the dough should no longer look wet, and it should gather into one large ball instead of clinging loosely to the bowl.
If those signs are missing, add one tablespoon of flour at a time and mix briefly after each addition. This controlled adjustment keeps the dough responsive to its actual condition rather than forcing it toward an arbitrary amount.
Once the dry-looking, cohesive texture appears, stop. That stopping point is what protects the tender quality of thick chocolate chip cookies while still giving the portions enough structure to bake into substantial rounds.
Why Resting After Baking Still Matters
The cookies need a few minutes on the baking sheet after leaving the oven because their structure is still settling. The puffiness will decrease somewhat, but the rounds should remain thick and hold together well.
| Stage | Expected appearance | What to watch |
|---|---|---|
| Before baking | High, round dough balls with visible chips | Keep portions separated on the baking sheet |
| At removal | Puffy with slight browning on tops and edges | Do not wait for deep browning |
| After standing | Slightly less puffy but thick and intact | Allow the structure to settle before handling heavily |
Serving These Cookies at Their Best
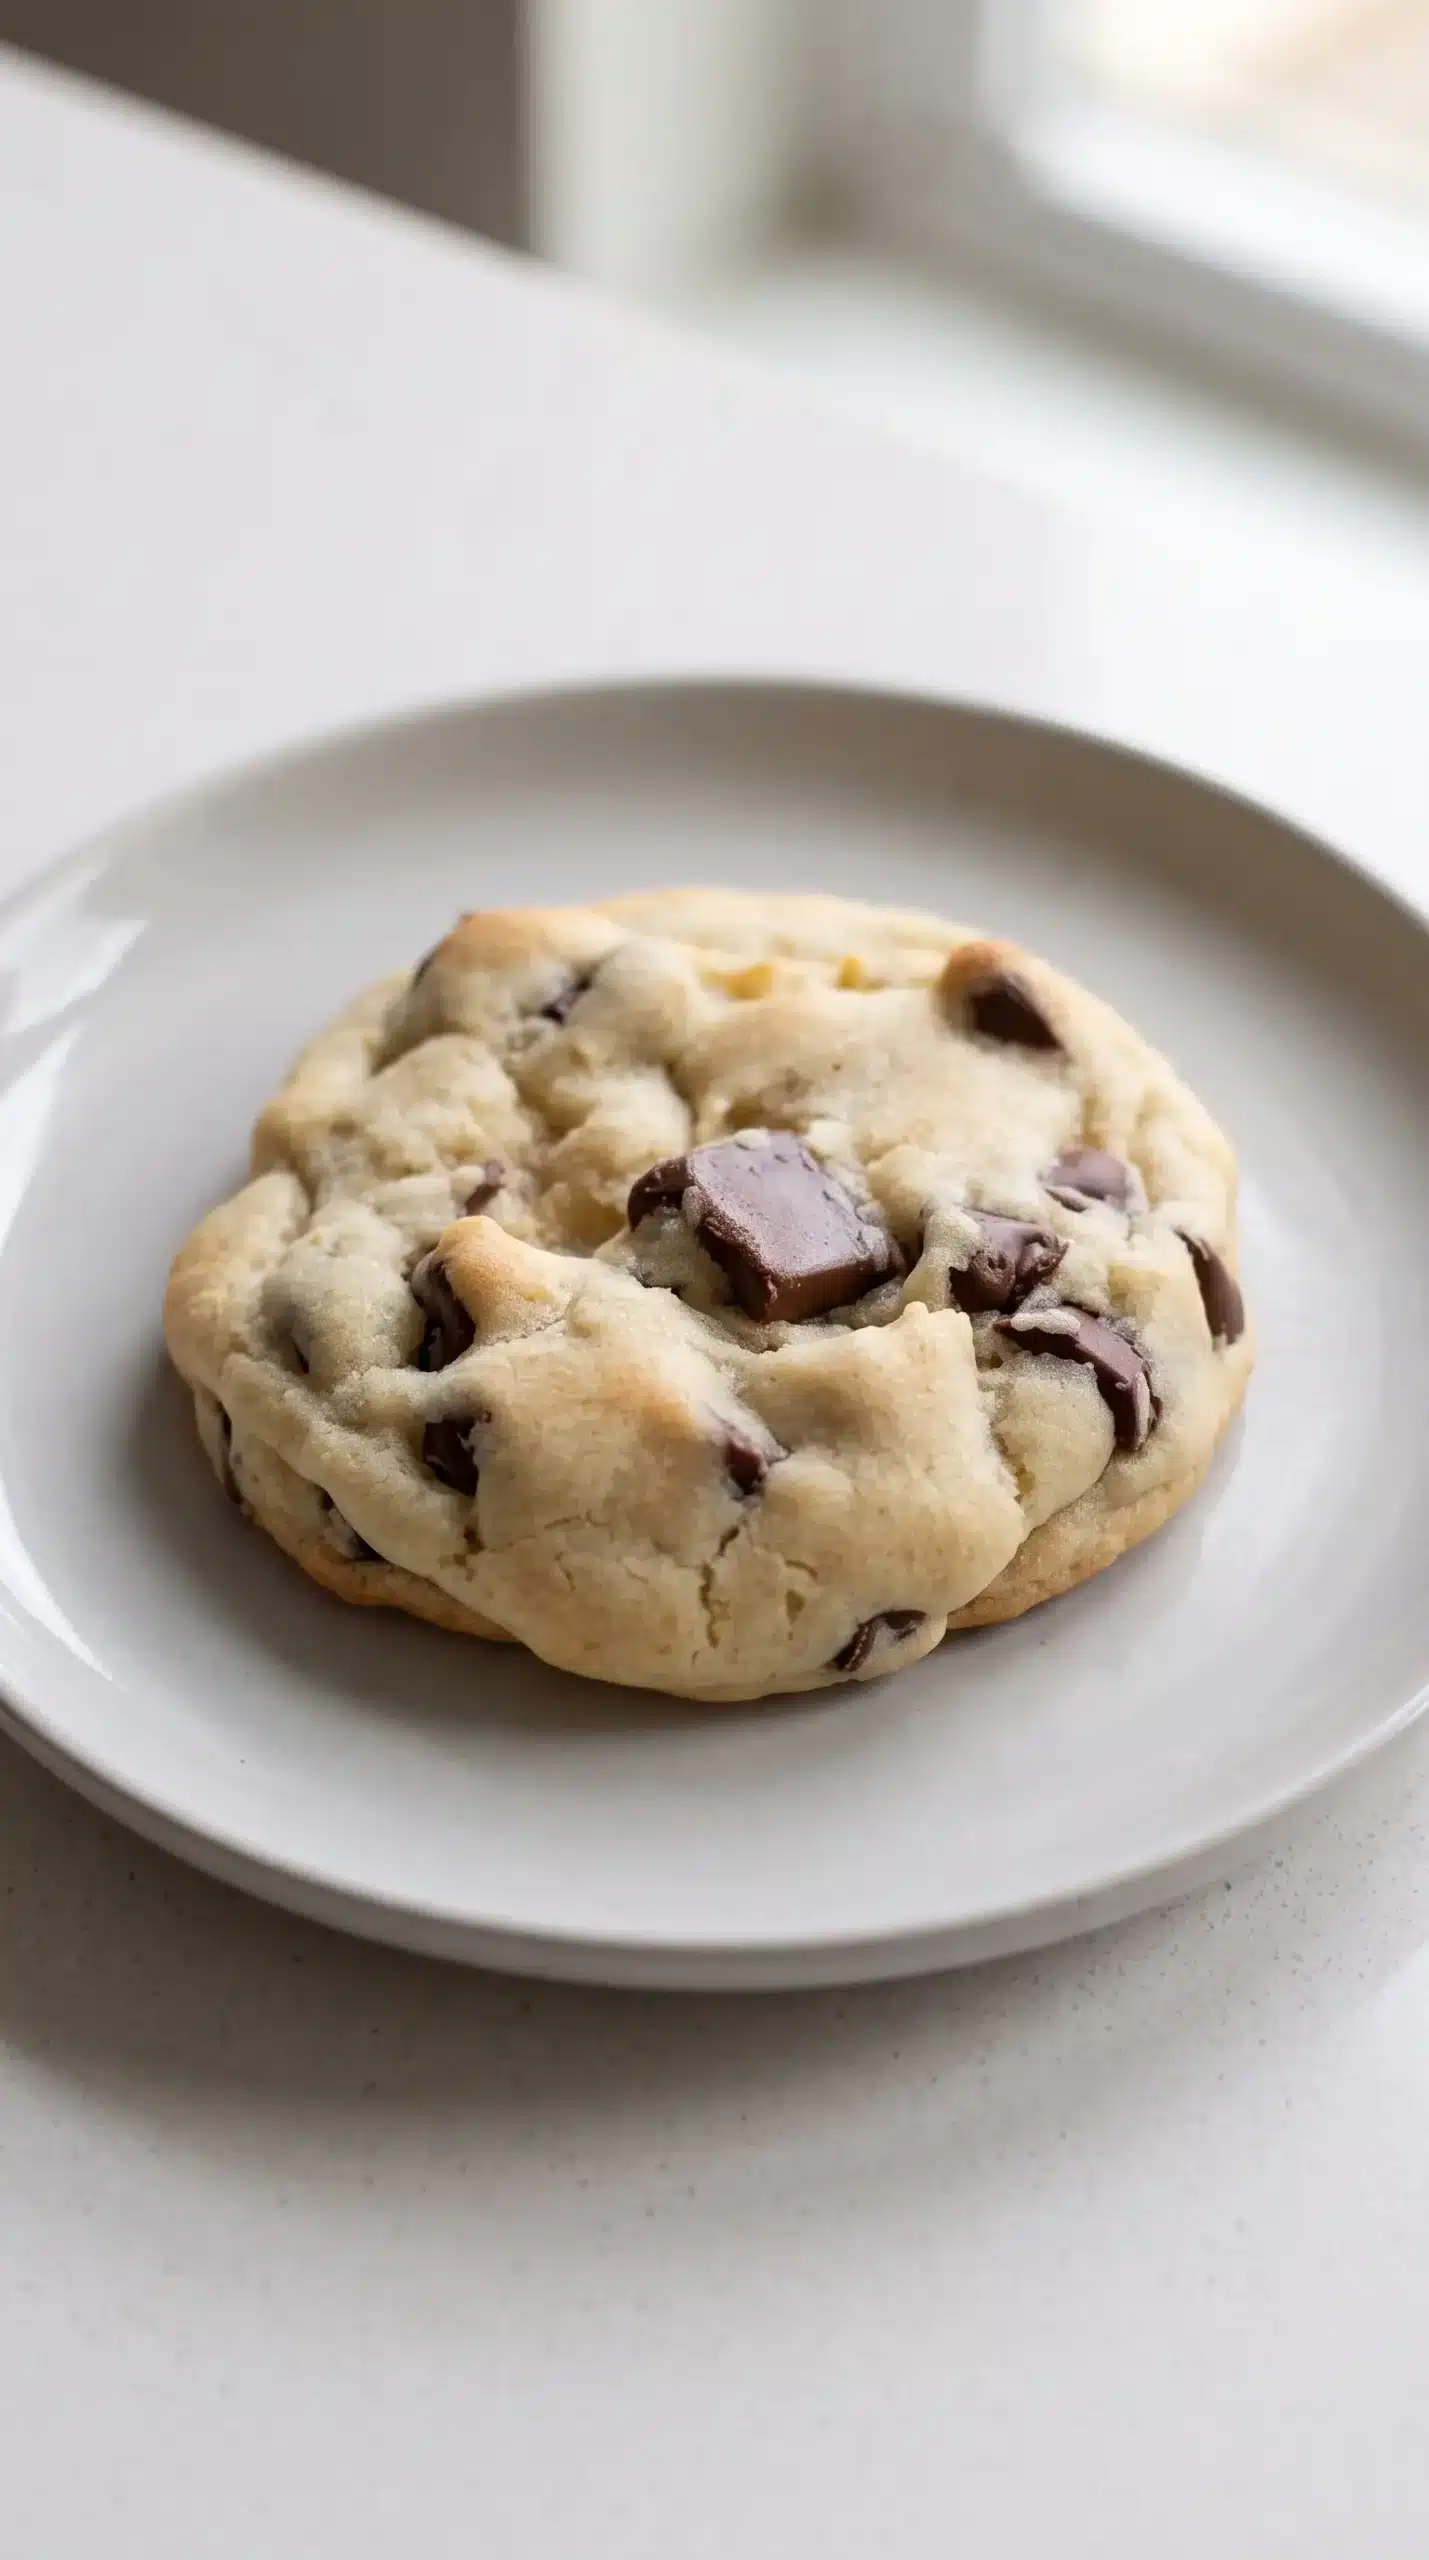
A short cooling period gives the baked cookies enough time to settle while keeping the texture soft and substantial. They can be served once they are stable enough to handle, with the chocolate chips still prominent across the tops and throughout the centers.
How to Judge the Dough Before Baking
The dough should feel cohesive rather than loose, with enough firmness to roll into tall balls without collapsing immediately. It should also avoid the stiff, resistant feel that signals too much flour.
That tactile check is more informative than adding a fixed extra amount of flour. The recipe deliberately starts with a measured quantity and leaves room for tablespoon-by-tablespoon adjustment because the correct stopping point is defined by the dough’s appearance and feel.
Half-Batch Chocolate Chip Cookies Depend on One Key Balance
The butter needs to cool into a soft solid, while the flour needs to stop increasing as soon as the dough becomes cohesive and dry-looking. Together, those two conditions give the tall portions enough structure without pushing the cookies toward a stiff texture.
Once the shaped dough reaches the oven, the same restraint carries through the bake: remove the cookies while they remain puffy and only lightly browned, then let them settle. That combination is what keeps the chocolate chip cookies thick, tender, and intact.
Chocolate Chip Cookie Questions About Flour and Baking
Can I use more than the starting amount of flour?
Yes, but only when the dough still sticks to the sides of the bowl and looks wet after the initial flour is incorporated. Add one tablespoon at a time and stop as soon as the dough becomes dry-looking and gathers into one cohesive ball.
Why did my cookies lose some of their puffiness?
A small amount of deflation after baking is expected. The cookies should lose some puffiness while standing, yet remain thick and hold together. A slight reduction in height alone does not mean they were baked incorrectly.
Can I completely melt the butter first?
The supplied method specifically calls for stopping when only about one third to one half of the butter has melted, followed by cooling until the butter is a soft solid. Completely melting it would change the intended starting consistency, so it should not be substituted for that partial-melting stage.
How do I know when the cookies are ready to remove?
Look for puffy cookies with just a tiny bit of browning on the tops and edges. They do not need deep color before removal, and they will continue settling after they leave the oven.
What makes these half batch chocolate chip cookies different from simply making smaller cookies?
The dough quantity is reduced while the individual portions remain substantial. Rolling each portion into a high, round ball helps preserve the thick shape, so the smaller overall batch does not require turning the cookies into thin or miniature portions.
Chocolate Chip Cookies for a Half Batch with Soft Centers
These chocolate chip cookies are thick, soft-centered, and lightly crisp around the edges, with plenty of chocolate in every bite. This easy half-batch is perfect when a smaller batch of classic chocolate chip cookies is just right.
Ingredients
Method
Preparation
- Set the oven to 350°F (177°C). While it preheats, place the butter in a stainless steel or glass bowl inside the oven. Remove it when about one third to one half of the butter has melted, making sure no more than half is liquid. Turn off the oven and allow the butter to return to room temperature for at least 30 minutes. It does not need to become completely firm, but it should be a soft solid.
- Add the white sugar, brown sugar, and vanilla to the cooled butter. Beat with an electric mixer until evenly combined and lightly fluffy. Add the egg and mix until incorporated.
- Add the flour, baking soda, and salt. Mix slowly with the electric mixer on low speed, scraping the bowl as needed, until the flour is incorporated. If the dough remains wet and clings to the sides of the bowl, add extra flour one tablespoon at a time until the dough becomes dry-looking and gathers into one large ball. Stop as soon as that consistency is reached to avoid making the cookies stiff.
- Fold the chocolate chips into the dough using a wooden spoon.
Baking
- Preheat the oven to 350°F (177°C). Shape 1/4 cup portions of dough into tall, round balls, placing some chocolate chips near the top. Arrange the dough balls several inches apart on a baking sheet.
- Bake for about 9 minutes, removing the cookies when they are still puffy with only slight browning on the tops and edges.
- Leave the cookies on the baking sheet for a few minutes after baking. They will settle and lose some puffiness while remaining thick and intact.
Notes
For soft, thick cookies, stop adding flour as soon as the dough becomes dry-looking and forms one cohesive ball.