From breakfast to dinner, from healthy meals to sweet desserts – Next Yum Recipes brings you quick, simple and tasty ideas for every occasion and every time.

Why does creamy pasta sometimes taste rich, but still feel a little flat after a few bites?
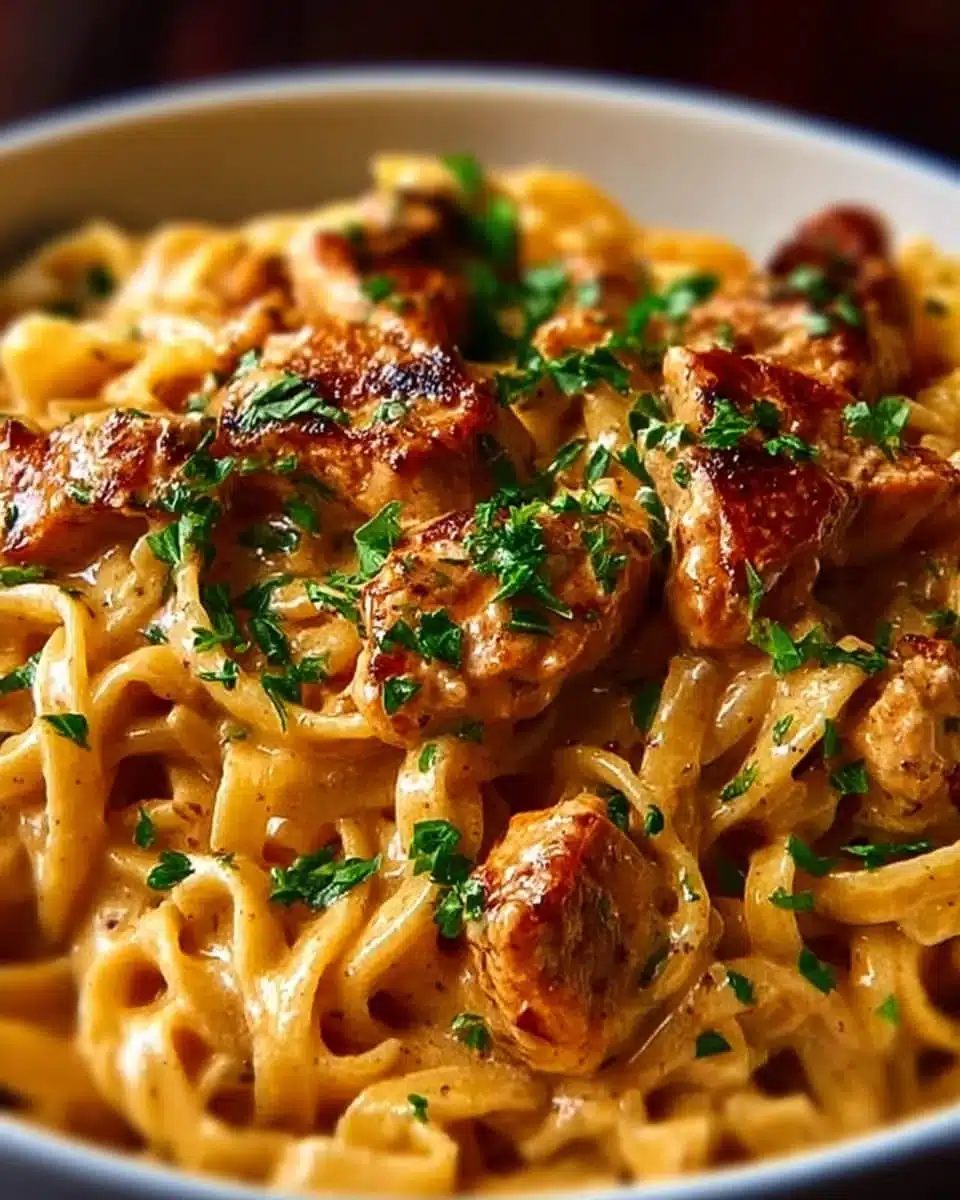
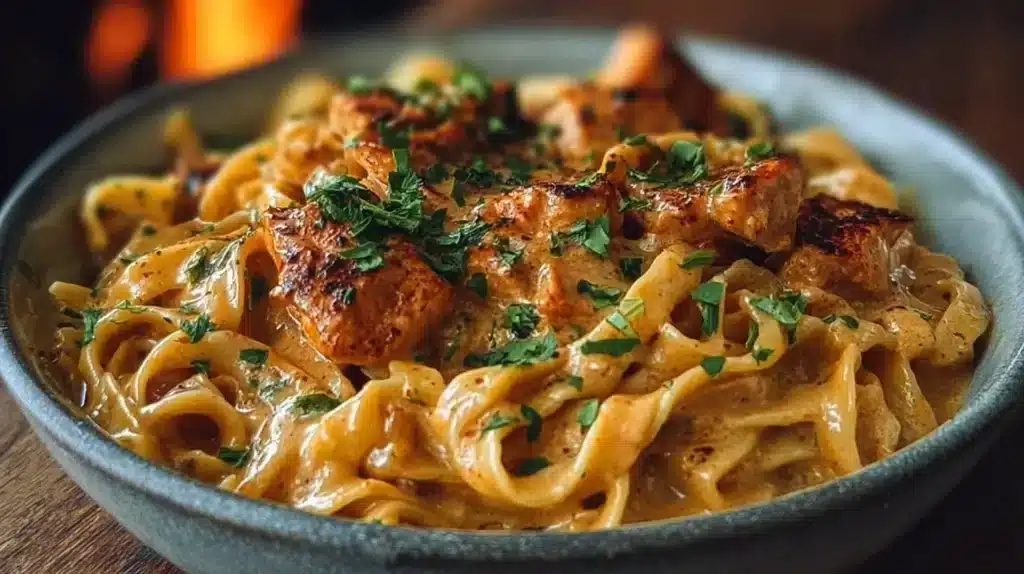
Cowboy Butter Chicken Pasta solves that with a butter-forward sauce that’s layered, not just heavy. You’re building flavor from browned chicken, garlicky butter, and a creamy base, then using Parmesan and herbs to sharpen the edges. When you do it right, the sauce clings to every noodle and still tastes lively.
Why Make This Recipe
You get a weeknight pasta that feels “restaurant-ish” without extra steps. The sauce comes together in the same skillet you use for chicken, so the browned bits don’t go to waste. That’s where a lot of the savory depth lives.
It’s also flexible. You can use different pasta shapes, adjust the heat level with pepper flakes, and even swap in leftover chicken. That makes it a smart choice when you’re cooking from what’s already in your fridge.
And the texture is satisfying. The sauce is silky, but not watery, and the chicken stays tender because it’s seared quickly and then warmed through at the end.
How to Make This Cowboy Butter Chicken Pasta
You’re working in phases that each do a job. First, you sear chicken to create browned flavor and a little texture. If the chicken releases liquid and turns pale, the pan usually needs more heat or more space.
Next, you build the sauce in the same skillet so it picks up all that flavor. Garlic and onion bloom in butter, then cream and broth loosen everything into a smooth base. A gentle simmer is enough. If it boils hard, the sauce can reduce too fast and lose its silky feel.
Finally, pasta and chicken go back in so everything gets coated. A small splash of starchy pasta water helps the sauce grab the noodles instead of sliding off. You’ll see it turn glossy and slightly thicker as you toss.
Ingredient Insights for Cowboy Butter Chicken Pasta
Pasta: Shape affects how the sauce feels. Long noodles give you smooth, coated bites, while short tubes catch sauce inside. Cooking just to al dente matters because the pasta finishes briefly in the skillet and keeps its texture.
Chicken breast: Chicken breast cooks fast and stays tender when it’s cut into even pieces. Uniform size is your best “insurance” against dry bits. If you prefer a juicier result, thighs also work, but the dish will taste slightly richer.
Butter: Butter is the base flavor here, not just a finishing touch. Unsalted butter gives you better control because Parmesan and broth add salt later. When butter hits the warm pan, you’ll smell a sweet, toasty note that signals it’s ready for aromatics.
Garlic: Garlic gives the sauce its punch. It should smell fragrant and warm, not sharp or browned. If it darkens quickly, your heat is too high, and the flavor can turn bitter.
Onion: Onion adds sweetness and body. As it softens, it mellows the garlic and makes the sauce taste more rounded. That “cooked onion” aroma is subtle, but it keeps the dish from tasting one-note.
Heavy cream: Cream creates the silky texture. It also softens the bite of garlic and pepper flakes. Keeping it at a gentle simmer helps it stay smooth rather than reducing too quickly.
Chicken broth: Broth keeps the sauce from feeling too heavy and helps you adjust consistency. Low-sodium broth gives you more control, especially since cheese will bring saltiness later.
Parmesan cheese: Parmesan adds umami and thickens the sauce slightly as it melts. Freshly grated Parmesan blends more smoothly. Pre-shredded can melt less evenly and sometimes gives a slightly grainy finish.
Italian seasoning: Italian seasoning adds background herb flavor without extra chopping. It’s most helpful when you want the dish to taste “complete” quickly, but it shouldn’t overpower the butter and garlic.
Red pepper flakes: Pepper flakes add gentle heat that keeps the creamy sauce from tasting flat. Start small if you’re unsure. You can always add more at the end, but you can’t take it out once it’s simmered in.
Parsley: Parsley is more than decoration. It adds a fresh, green lift that makes the sauce taste lighter. Stirring some in at the end keeps the flavor bright.
Texture & Flavor Experience
When Cowboy Butter Chicken Pasta is done right, the sauce looks glossy and coats the noodles in a thin, silky layer. It shouldn’t pool watery at the bottom, and it shouldn’t feel like a thick paste either.
You’ll taste butter and garlic first, then a gentle savory depth from chicken and Parmesan. The pepper flakes show up as warmth, not a burn. The chicken should feel tender, with lightly browned edges that give small pops of flavor.
How to Serve Cowboy Butter Chicken Pasta
Serve it hot, right after tossing, while the sauce is at its glossiest. You can bring the skillet to the table for a casual, family-style feel, or plate it and finish with extra Parmesan so everyone can adjust to taste.
A crisp green salad or roasted vegetables help balance the richness. If you want a brighter finish, lemon wedges on the table let you add a quick squeeze that wakes up the butter and cream.
Tips to Make Cowboy Butter Chicken Pasta
- Cut chicken into even pieces so it cooks at the same pace and stays tender.
- Brown chicken in batches if needed so you get golden edges instead of steamed meat.
- Keep garlic on gentle heat so it turns fragrant, not brown and bitter.
- Simmer the sauce softly rather than boiling to keep it smooth and silky.
- Reserve pasta water and add it a little at a time until the sauce turns glossy and clingy.
- Use freshly grated Parmesan for smoother melting and better flavor.
- Adjust pepper flakes at the end so you control heat without changing anything else.
- If the sauce looks separated, whisk in a splash of warm pasta water to bring it back together.
Common Mistakes to Avoid
- Overcrowding the pan when browning chicken. It releases water and steams instead of searing.
- Boiling the cream hard. High heat can reduce too fast and affect the sauce texture.
- Skipping pasta water. Without it, the sauce can feel thick yet still not cling well.
- Adding Parmesan over very high heat, which can make it melt unevenly.
- Overcooking the pasta. Soft noodles turn the finished dish heavy and less satisfying.
Storing Tips
Store leftovers in an airtight container in the refrigerator. The sauce will thicken as it chills, which is normal for creamy pasta. When you reheat, a small splash of milk, cream, or water helps loosen it and bring back the silky finish.
If you freeze portions, thaw overnight in the fridge and reheat gently on the stove. Creamy sauces can change texture after freezing, but low heat and added liquid help smooth things out.
FAQs
Can you use leftover or rotisserie chicken for Cowboy Butter Chicken Pasta?
Yes. Using cooked chicken makes the dish faster. You’ll still want to build the sauce in the skillet and warm the chicken gently at the end so it doesn’t dry out.
How do you keep the sauce from separating?
Keep the sauce at a gentle simmer, not a boil, and use pasta water to help it emulsify. Stirring steadily as you add cheese also helps it stay smooth.
What pasta shape works best?
Short shapes like penne catch sauce inside the tubes, while long noodles feel more silky. Use what you like, but aim for a shape that can hold the creamy sauce well.
Conclusion
Cowboy Butter Chicken Pasta is a dependable way to get a creamy, flavorful dinner on the table without a long prep session. When you focus on browning the chicken, simmering gently, and using pasta water to bind the sauce, you’ll get that glossy, clingy finish that makes the dish feel special. If you want to adapt it with pre-cooked chicken, this creamy rotisserie chicken pasta variation is a helpful reference.
Cowboy Butter Chicken Pasta
A rich and comforting pasta dish featuring a creamy butter sauce and tender chicken, perfect for quick weeknight dinners.
Ingredients
Method
Cook the Pasta
- Bring a large pot of salted water to a rolling boil. Add the pasta and cook according to package instructions until al dente (typically 8-10 minutes). Reserve 1 cup of pasta water, then drain and set aside.
Sauté Chicken
- In a large skillet, melt 2 tablespoons of butter over medium heat. Add the diced chicken, season with salt and pepper, and cook for about 6-8 minutes until golden brown and cooked through. Remove the chicken and set aside.
Create the Sauce
- In the same skillet, add the remaining butter and sauté the minced garlic and diced onion until translucent (about 3-4 minutes).
Add Cream and Broth
- Pour in the heavy cream and chicken broth, stirring to combine. Add the Italian seasoning and red pepper flakes, and let the sauce simmer gently for about 5 minutes until it thickens slightly.
Combine Pasta and Chicken
- Return the cooked chicken and drained pasta to the skillet with the sauce. Adjust seasoning as needed and toss everything together. Cook for another 2 minutes to meld flavors.
Serve
- Sprinkle grated Parmesan cheese over the top and garnish with fresh parsley. Serve warm.
Notes
Store leftovers in an airtight container in the refrigerator for up to 3 days. Add a splash of liquid before reheating to prevent drying out. Alternatively, you can freeze for up to 2 months.


